Our House - The Attic Bathroom
We’re still living in the attic, so this is the bathroom we use everyday. This is what the space looked like when we bought the house; totally unfinished attic space with one of the pull-down ladders for access in a closet.

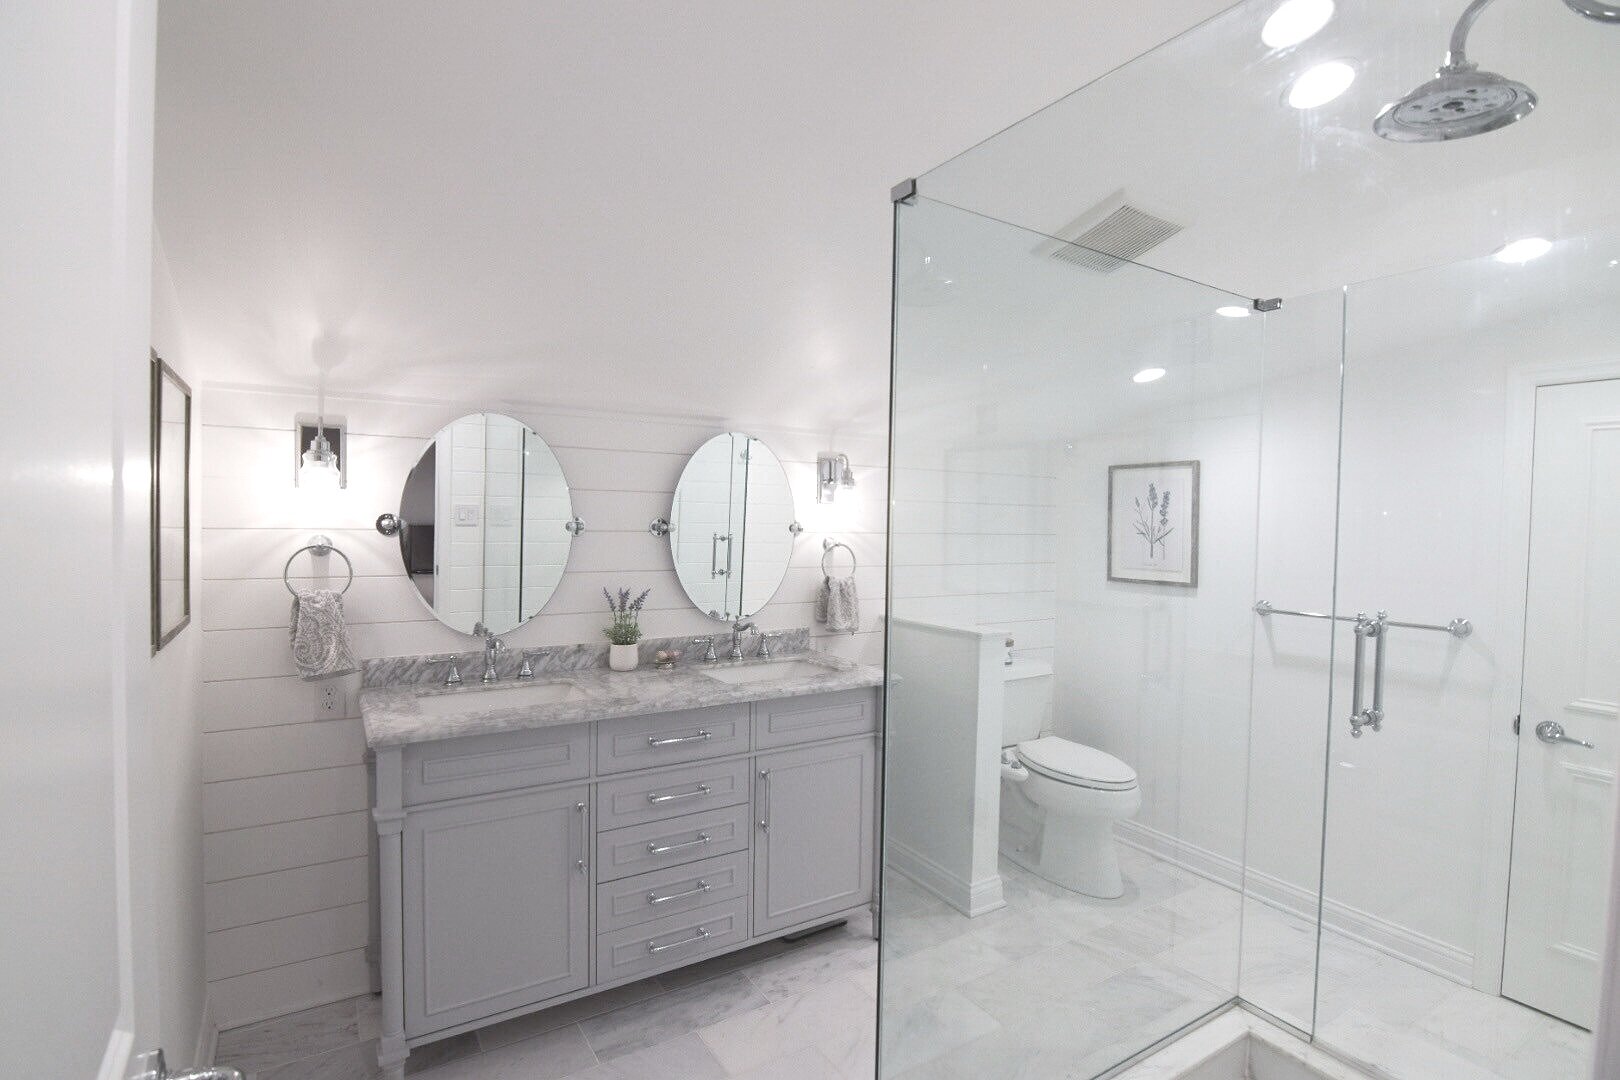
And that same space now:
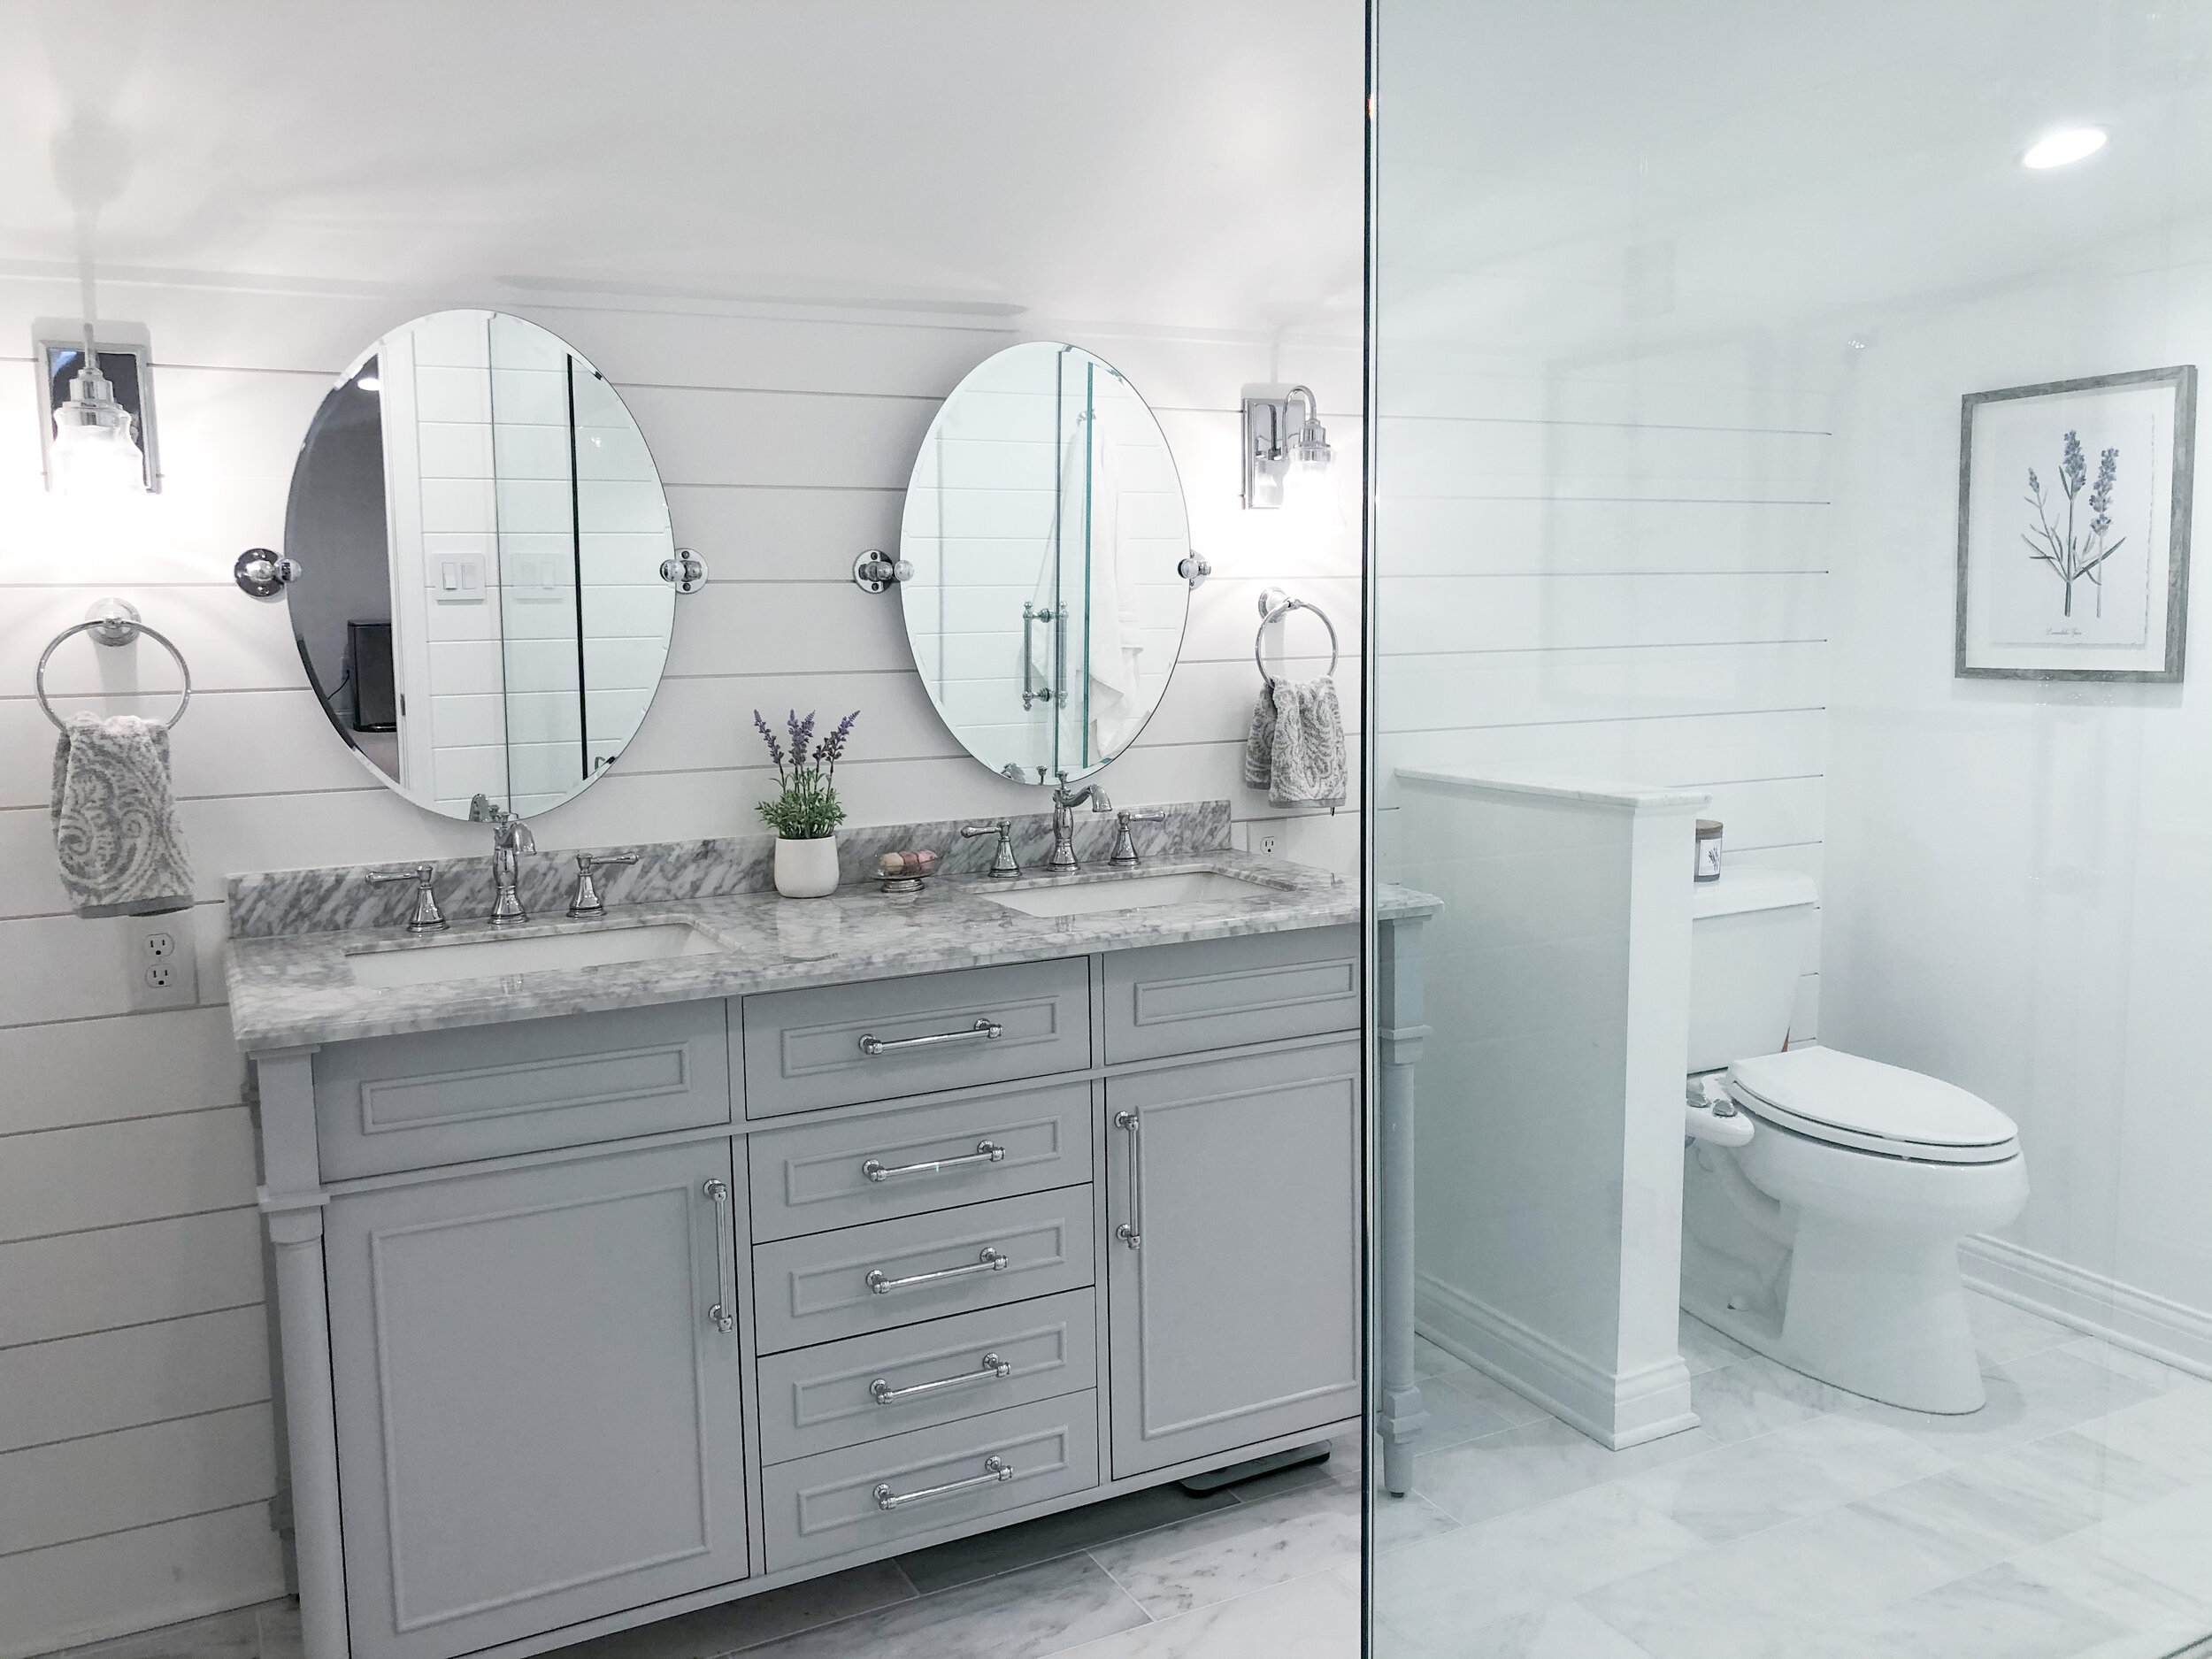
It was an EXTREMELY difficult space to get to work well. The entire space was roughly 8’ x 12’ which is fine from a square footage perspective, but the roof posed a huge headache. There are 3 different slopes, starting at roughly 8’ at the high point and 5'-6” at the exterior walls. Trying to figure out where to put a shower head and how to get a usable vanity wall took a bunch of tries in our 3D modeling program to find something that would fit. For instance, the vanity wall is an exterior wall, so it’s only 5’-6” tall. Before any construction took place, we had to plan out exactly how much space we’d need for the framing and drywall on the ceiling, the floor tile, the vanity, the vanity backsplash, and the mirrors. It was a lot to plan, but thankfully we made everything fit well. In the picture above, you can see we figured out we’d have to go with sconces, rather than vanity lights, as we wouldn’t have the height required for vanity lights. We also used mirrors that can be tilted up or down slightly to accommodate anyone who might be a bit taller. Finally, we located our outlets on each side of the vanity, off the edge and slightly lower than normal, to help not only hide cords and maximize counter top space, but also provide enough clearance for the hand towels to hang comfortably. Lots to think about!
As for the finishes, we wanted to keep the space as light and bright as possible to help hide the low ceilings and make the bathroom feel as large as possible, especially since we don’t have any natural light in here to help with that. Therefore, we went with marble tile on our surfaces and white on the walls. The grey veining in the marble, the grey vanity, and the shiplap give it a nice touch of interest and some texture to break up all the white, while still not constricting the feeling of the space with any heavy accents or colors. Overall, it’s turned out better than we expected and there’s nothing we would have done differently! All the planning in the beginning really paid off in the end.
If you follow us on Instagram, you may have seen the disaster that happened right as we were about to finish this space. We had the whole room done except for the glass around the shower. During install, the company we hired accidentally hit the largest panel of glass on the angled ceiling in here and the panel shattered, sending glass flying everywhere. Thankfully, no one was seriously injured, but it did cause a substantial amount of damage to our bathroom. It damaged the vanity, the walls, the ceiling, the door, and the tile. Check out the damage in the pictures below. Click to enlarge.


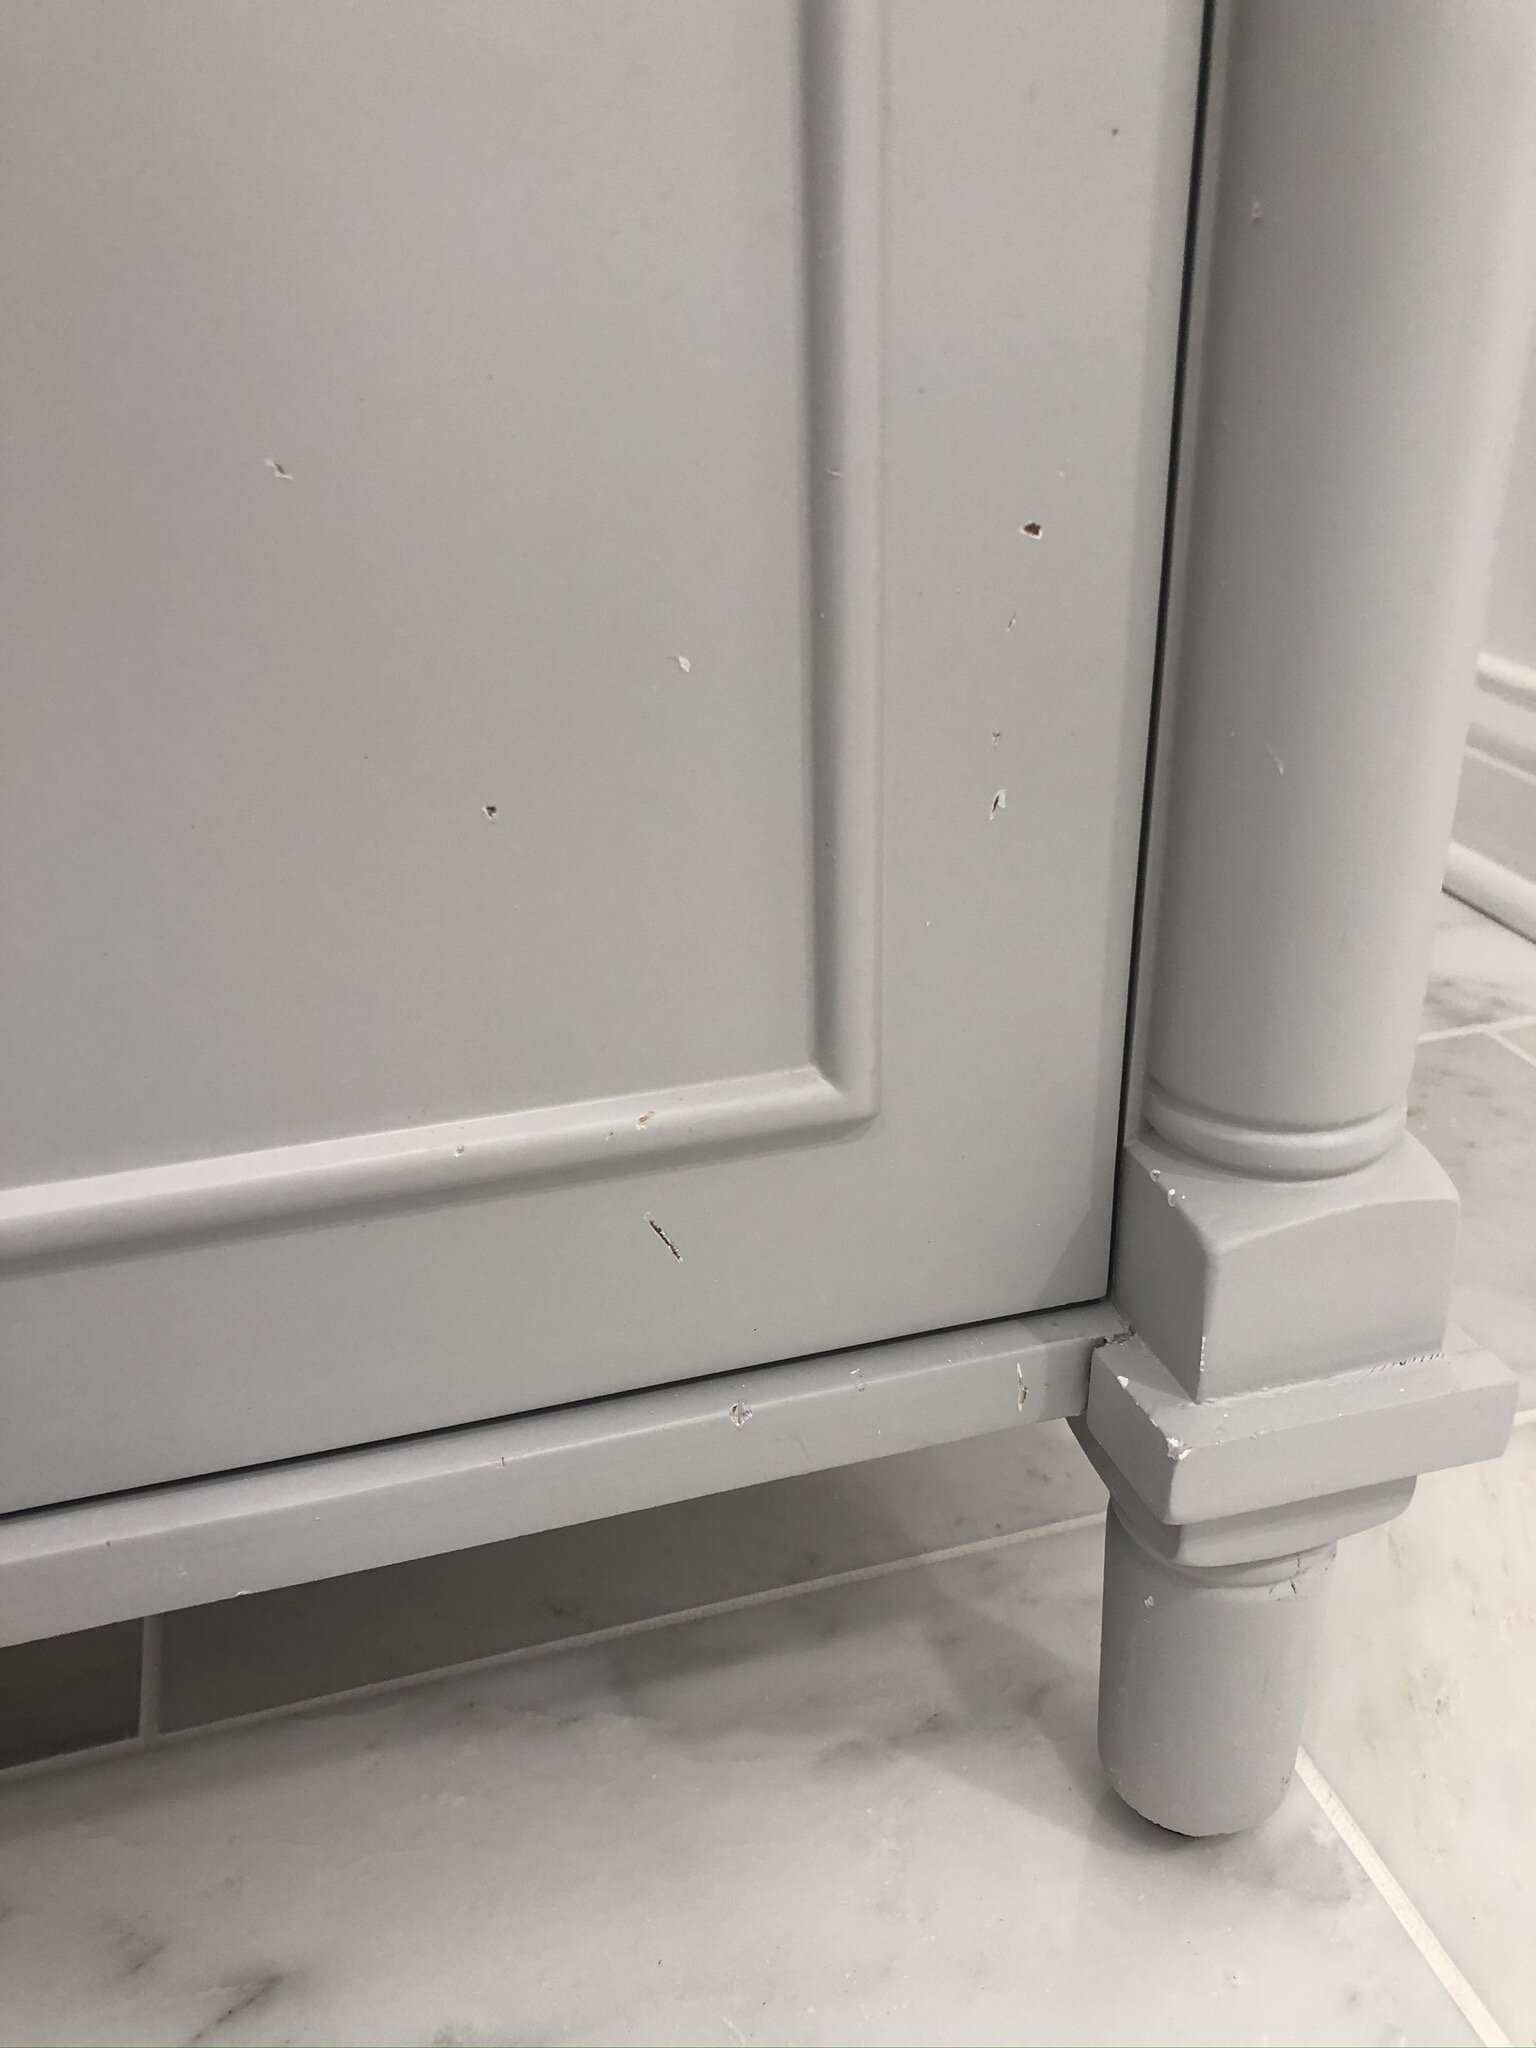


It was especially stressful because at this point I was 7 months pregnant and we really needed to get the attic done so we could move in and have more space for us and the baby. Thankfully the company took full responsibility and had everything that was damaged either fixed or replaced. Phew!
Let’s talk about that shower now. Here it is finished!
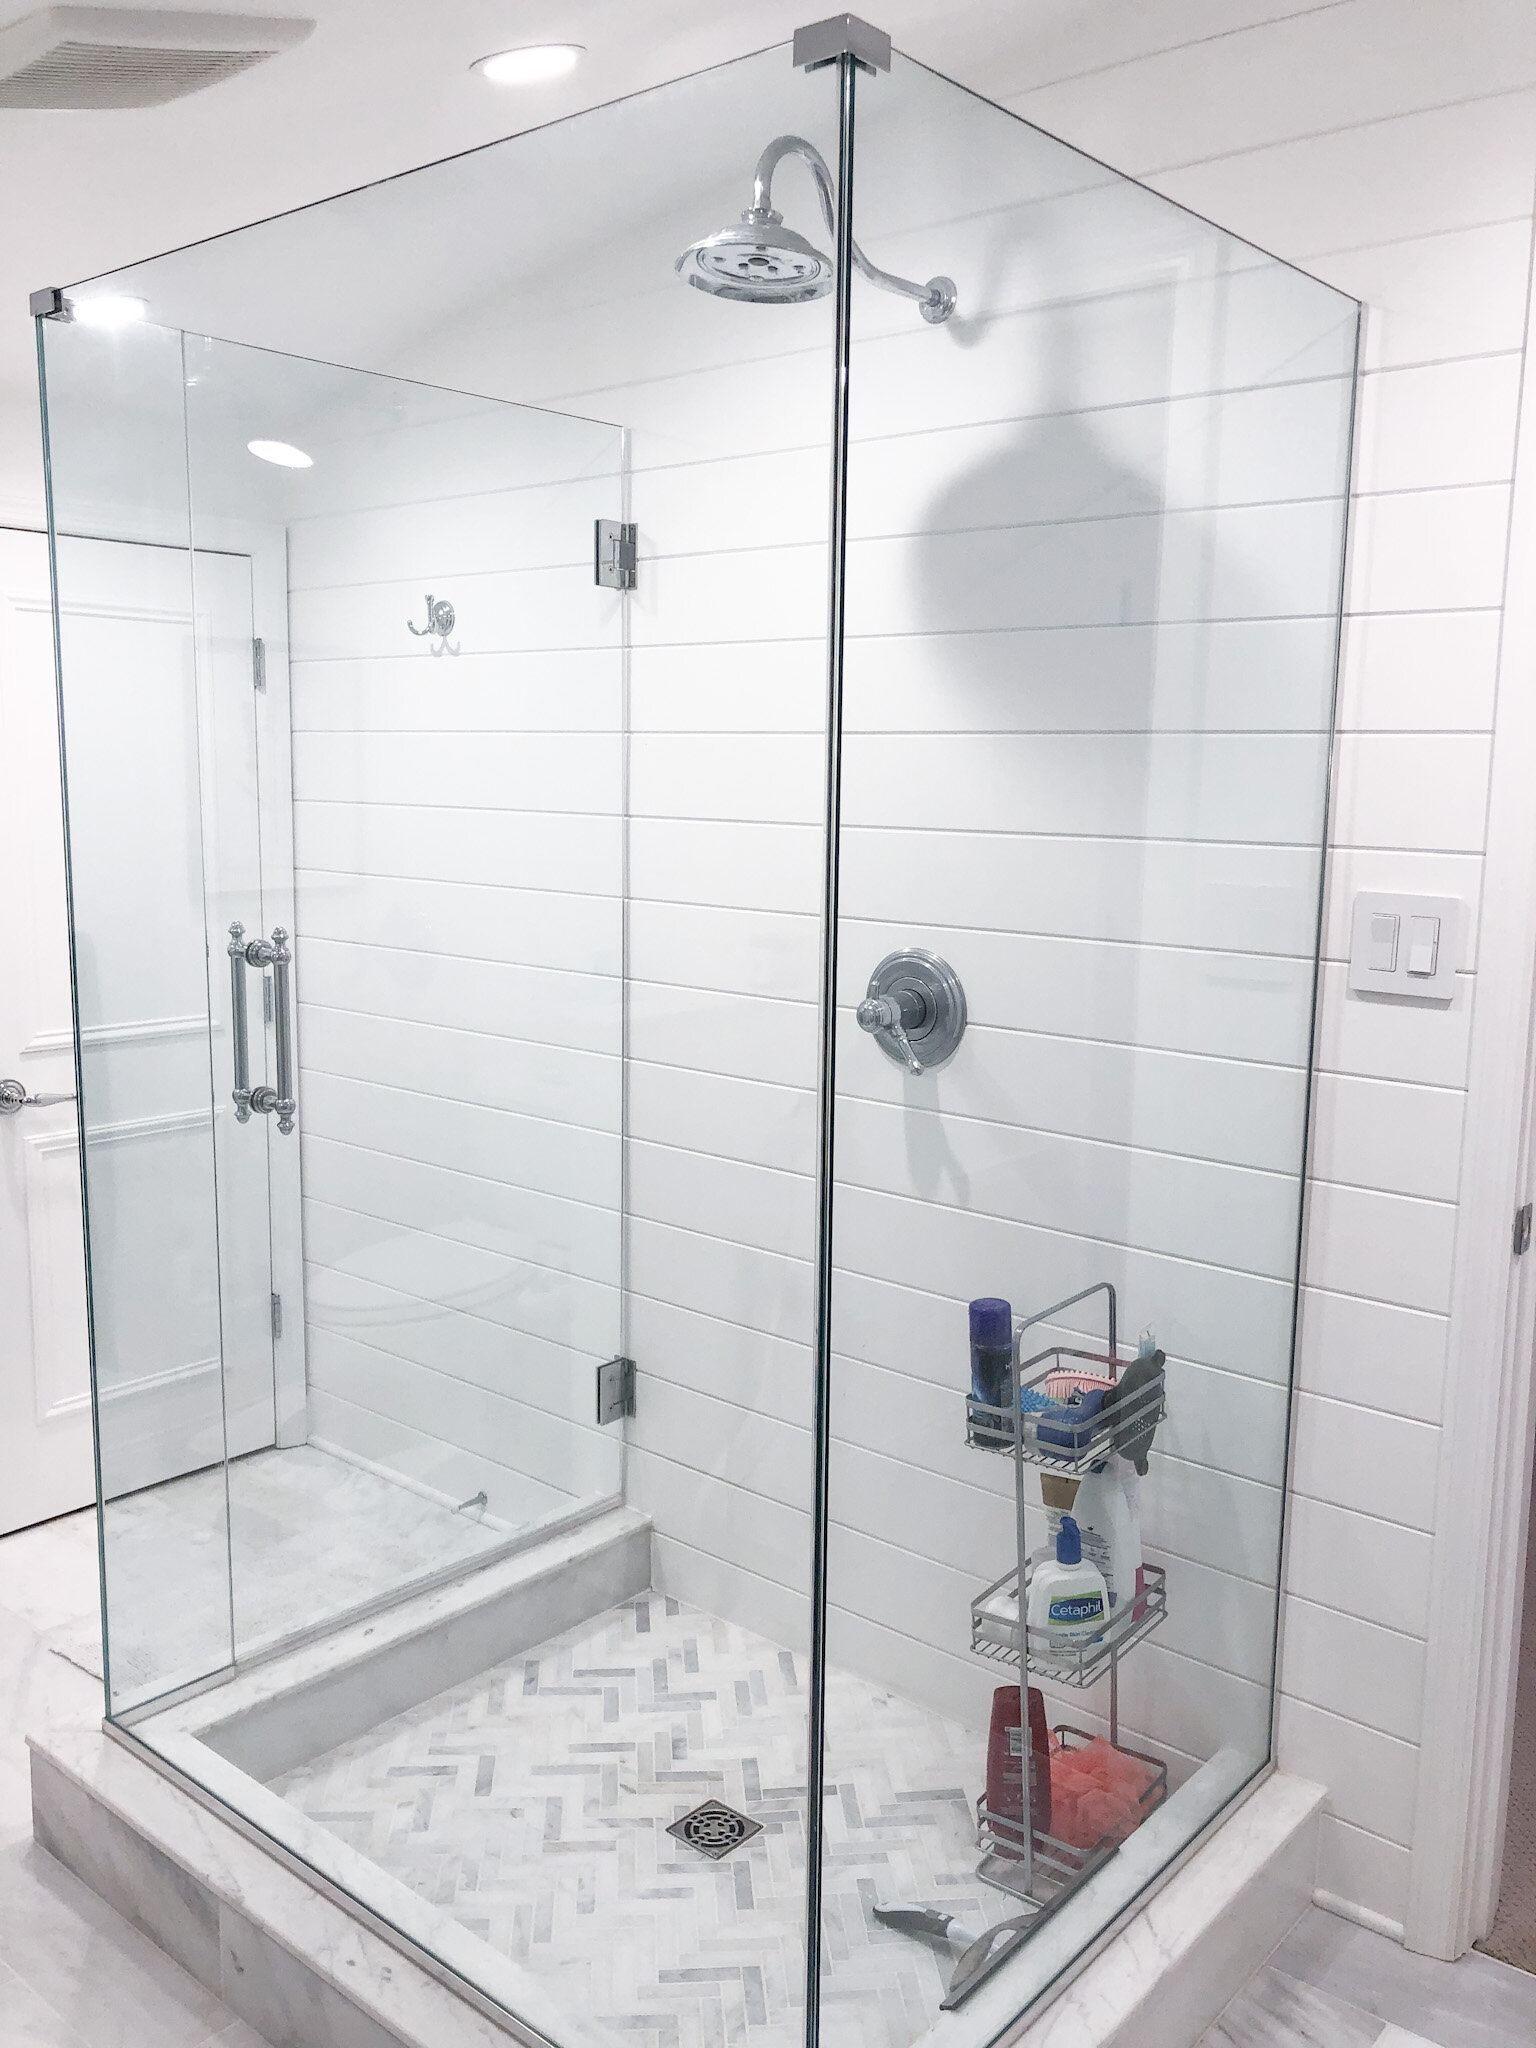
Our shower design didn’t allow for a niche, so rather than put all of our shower items on the floor, we found a shower caddy at Home Goods and it’s been working great. It has little rubber feet on it so no chance of rust on the tile.
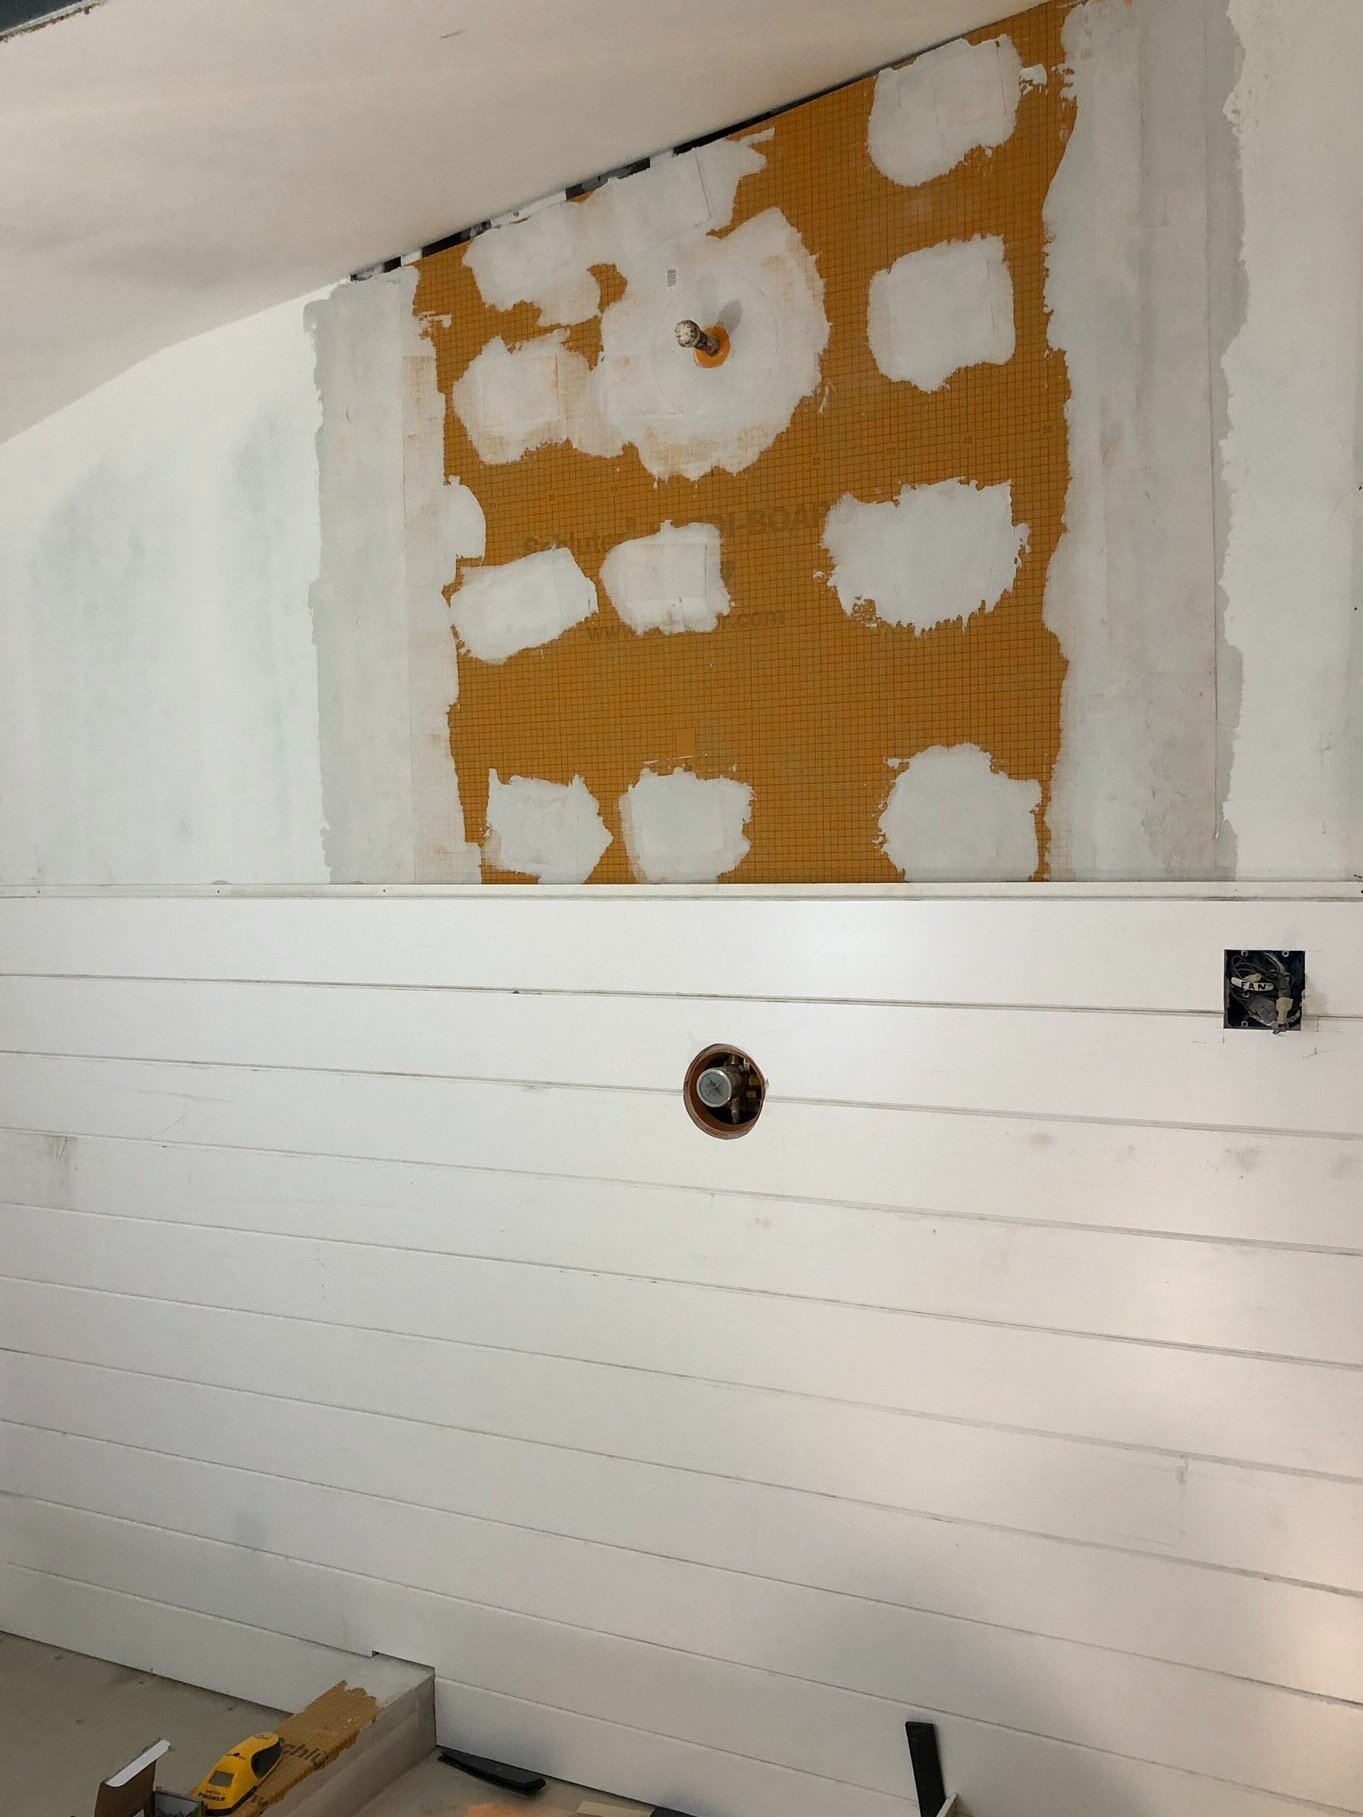
We decided to use exterior PVC siding instead of tile in this shower. I was inspired by Flippin Wendy who used it in a shower she did. I hadn’t ever heard of doing that, but I did a bunch of research and we decided to give it a shot. We installed a Schluter system behind the siding and haven’t had any issues at all in the 6 months we’ve been using it. The picture below is when we were about half way through installing the siding.
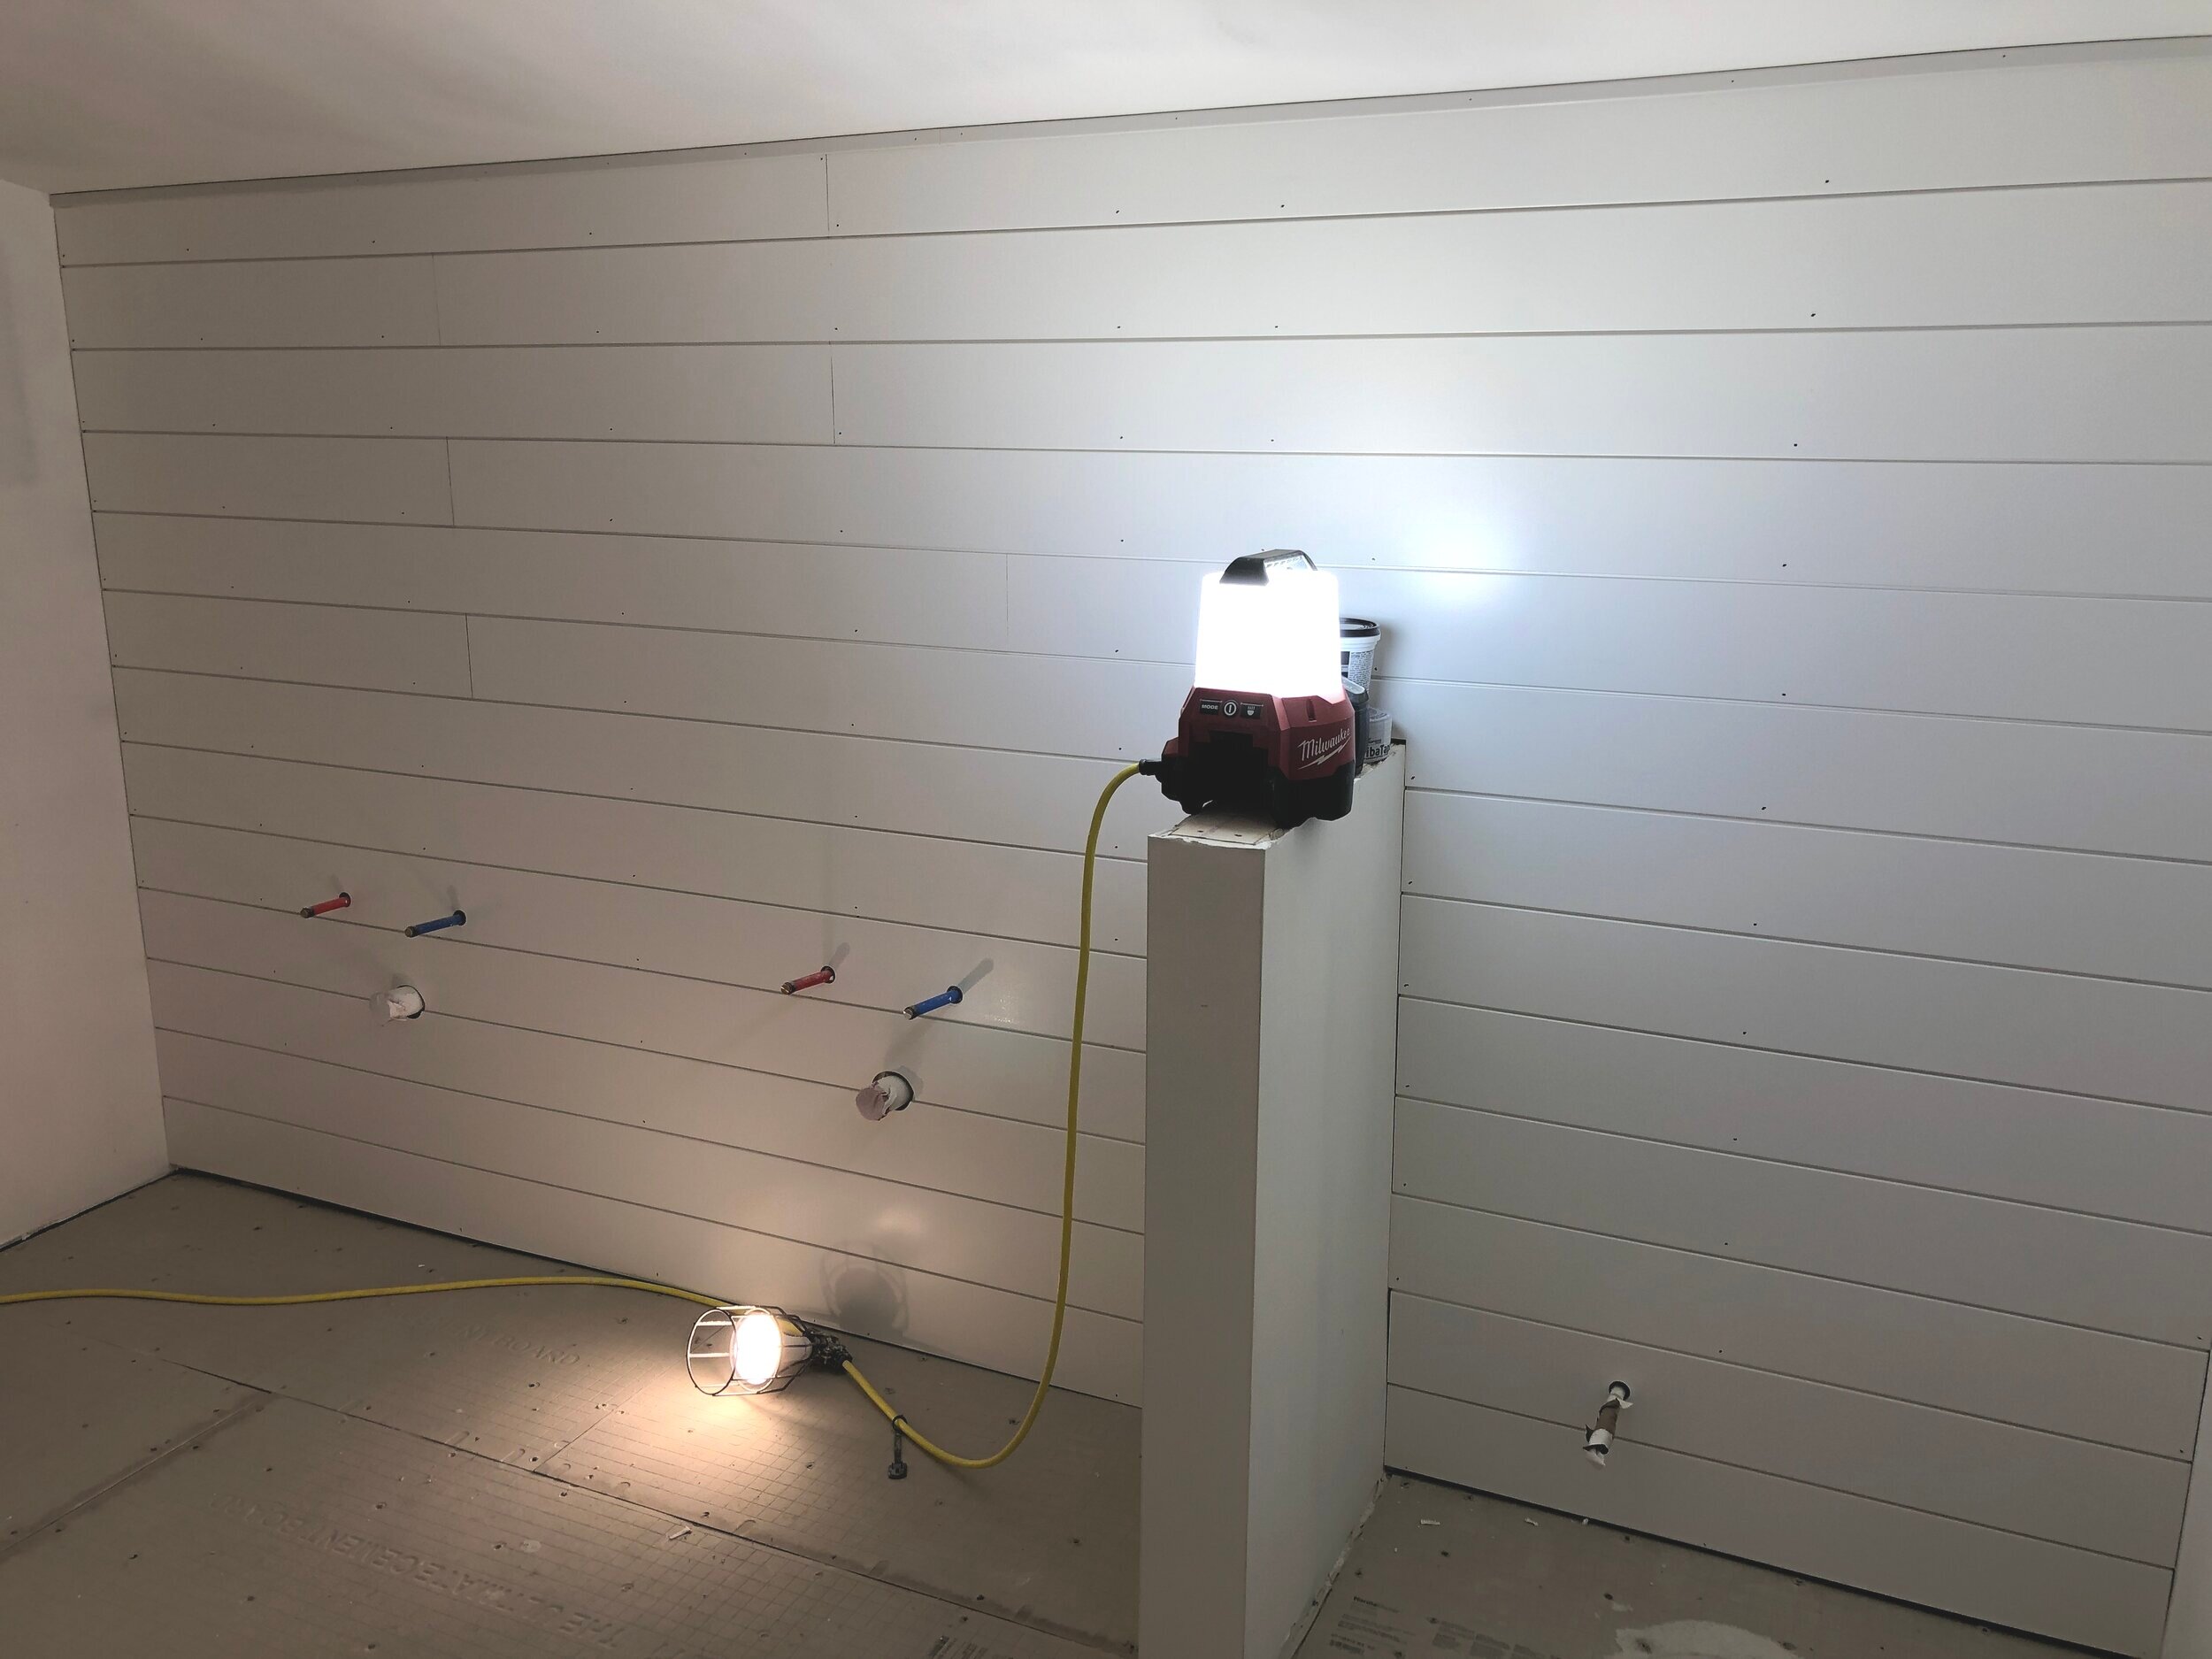
I wanted a similar look on the vanity wall, so we used shiplap there. If you look closely, the profile of the exterior siding and the shiplap don’t match, and we worried it would bother us forever, but you really can’t tell unless you know what to look for. We would’ve used the siding on both walls, but the exterior siding was ~$80/board, and the shiplap was ~$5/board, so not cost effective at all. As you can see in the picture below, we purposefully placed the seams in the shiplap where we knew they’d be covered by the vanity and mirrors.
When designing this space, the room was so big that we ended up making part of it into a storage closet with built-in shelves and I’m soooo happy we did. It houses so much of our stuff. The door in the picture below leads to the closet.

We had to make the door ourselves because the ceilings are so low in that part of the room. We bought a slab door and cut it down then applied molding to it. See below. There’s two doors shown in one of the pictures because we had to make another door for a different low spot in the attic. Working with sloped ceilings was definitely a challenge in more ways than one!


Here’s the storage closet before and after we built shelves for it. We designed it so it would have that nook in it, allowing the perfect spot for shelves!


Lastly, this is the only space in the whole house I’ve bought any decor for. I only bought a few things, but did want to make sure it looked nice because we actually shot a how-to video for Delta Faucet in here. We usually shoot in a studio, but it was during quarantine, so when asked if we’d be willing to use our personal bathroom, we happily agreed. The video is being used by Home Depot for several of their Delta Faucet showerheads.
Thanks for checking out our bathroom! Here’s one final look.